Various methods are available to connect the printer to the system. It’s wireless, USB and wired. Verify that the printer supports these methods of connection. Use the steps below to start connecting the canon printer to a computer.
Methods to link the system to the canon printer
- Use the appropriate buttons to switch on your printer and system.
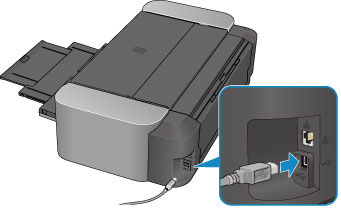
- To create a wired link, use the USB or Ethernet cable.
- Push the WPS button on the wireless link router.
- Install the driver on the system if the link is not formed.
- To start the driver installation process, use the software installation disk.
- Make sure the printer is connected to the Internet.
- If you use a Mac system, add the name of the printer to the list.
Easy techniques for connecting the system to the canon printer
Locate the Power button on the control panel of the printer. To switch the machine on, press it. Connect the printer to a stable internet router. Move your printer and system near your router to improve signal strength. If the printer supports Wi-Fi Protected Setup, discover the WPS button on the control panel of the printer that leads you to attach a canon printer to your laptop.
Click on the button. This procedure does not involve a password to link the equipment. Check whether the printer is enabled. Press the Wi-Fi button above the press panel until the alarm light flashes to link a canon printer to a laptop.
Check that the lamp next to the button turns blue. Press the WPS button for 2 minutes or more. If the printer detects a Wi-Fi network around it, the Power and Wi-Fi lamp flicker, helping the printer to connect to a wireless network. Once the printer connects, energy and Wi-Fi light stops flickering and gets lit.
Place the simple paper in the input cabinet. Press the Resume or Cancel button for a minimum of 15 seconds. The printer begins to print a network report. Check whether the connection is active. Make sure that the name and password of the network are correct. If the name of the network is not correct, do the same thing to connect the canon printer to your computer.
Install the printer driver on the machine after the link phase. The normal link technique is the other way of connecting the printer to a network. Use your Windows system software installation CD. Place the CD on the disk drive. Wait until the configuration file is displayed on the panel. To start the installation process, click on it.
Wait for the original display screen. Choose Next. Type the password in the relevant table to allow the help tool to start the installation process when the printer is connected to a Mac system. To start the setup to connect canon printer to a desktop, select the Install helper icon.
There is a window on the screen. Choose between a USB connection or a wireless one. Check whether the printer and the system are upgraded. Click the Network Connect option. If needed, choose the Other Setup technique. Wait for the blue Wi-Fi light to flash fast and complete how the canon printer can be connected to a computer.