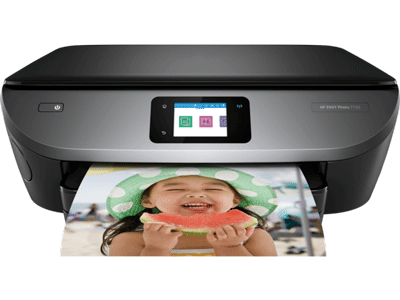
Are you searching for a 123.hp.com/envy7155 printer, which can easily perform all duties? Perform multiple tasks like printing, scanning and copying with your printer.
Setup and Installation of the HP Envy 7155 Printer Setup Steps Go to 123.hp.com/setup 7155.
- Download HP Envy 7155 Printer driver software.
- Enter your printer model and press Start to download your HP Envy 7155 Driver.
- To download the driver, double-click on the driver file that you have uploaded to your desktop to begin the installation process.
- Follow instructions on the screen and finish the setup and installation of the HP Envy7155 printer attachment and driver.
- Now return to 123.hp.com/envy7155 Registration and activation finishes page.
UNPACKING YOUR NEW HP ENVY 7155 PRINTER
STEP 1: UNSEAL THE BOX SAFELY AND TAKE OUT THE PRINTER
- 123.hp.com/envy7155 printer is covered with tags and stickers and with cables and cabinetry that help connect your Mac or Windows computer to the printing device.
- Carefully remove the printer from the box and position on a clean surface; remove the tapes and packing materials around the printer.
- The control panel of the printer has a protective sticker to remove.
- Hold the printer’s side handles and raise the access gate of the HP Envy 7155 incubator until it fits in. Now remove from the printer all the supporting equipment and tape.
- Bring the ink cartridge access gate down and closed it.
- Lift the door upward, grab it so the paper tray is expanded and remove the packaging tape afterwards.
STEP 2: SET YOUR HP ENVY 7155 PRINTER AT YOUR COMPUTER:
- Drag the tray forward and close until the tray can move anymore, before linking your printer to power outlet. Remove the covers used to pack the materials inside the printer.
- Connect the printer to a power supply, energy the device and customize the preferred configuration.
One end of the power cord should be linked to the back of the printer and the parallel end to an electrical outlet. Turn your printer back on 123.hp.com/envy7155. - On the printer control panel, select your favorite word and country / region, then click Yes to approve your choice.
- The date and time must be set only if requested. This can be achieved by taping Yes and confirming your decision.
Step 3: PRINTING A PRINT JOB
- If the cartridges have been correctly aligned on a printer, an alignment page will be printed.
- Insert plain paper A4 or US letter size into the input cabinet of the printer.
- Pull out the door of the input tray to open it and extend it softly to you.
- Move the paper width guides to their extreme end.
- Put a stack of A4 paper in the cabinet; notice that the lower end is to be shifted down the print side.
- Push the stack in the cabinet until it moves no further.
- Align the paper length guides so that the paper stack does not bend or curl. Slowly move the input tray forward and guarantee it is fixed.
STEP 4: SETTING UP INK CARTRIDGE SYSTEM
- Lift the ink cartridge access gate and make sure it’s strongly positioned within.
- Take the cartridge out of your pocket and hold the HP Envy 7155 Ink cartridge alone with the black plastic.
- Peel off a plastic tape that covers your ink cartridge.
- Upon the ink cartridge slot, place the lid.
- Grip on his sides the ink box with the nozzles facing the printer 123.hp.com/envy7155. And then move the cartridge in its slot until it fixes strongly in position.
- Shut the deck over the ink cartridge slot to move securely.
- Follow the directions again to install the other ink cartridge in this step.
- When the ink cartridge is replaced in its slot, closed the lid.
- Check whether you put the black ink cartridge at the right and the color ink cartridge at the bottom.
- Now bring the lid down to close the cartridge’s gate.
STEP 5: HP ENVY 7155 INK CARTRIDGE ALIGNMENT
- Print the alignment page of 123.hp.com/envy7155 printer to ensure that printed quality is properly kept.
- Pull the scanner lid up. Keep your alignment panel with the print side facing the scanner glass to see if the quality of the print is up to the limit. Confirm that the sheet is placed on the scanner glass in accordance with the incised guides.
- To align the cartridges, click OK. On the control panel, click OK.
STEP 6: PRINTER SOFTWARE INSTALLATION
The HP Envy 7155 Setup is the first step to start a printer software installed by using your computer’s instructions.
- You can either download the updated version of the software on our website or use the setup CD supplied with your printer box.
Setting up your 123.hp.com/envy7155 Printer for the First Time
Download your 123.hp.com/envy7155 Printer and install it on your Windows desktop
- Make sure HP Envy 7155 Setup is running and powered on.
- If it’s attached with a laptop or any other device, remove the USB cable from the printer.
- Go to our website and enter the name and model of the HP Printer in the field of service.
- Join the prompts for the downloads section on the windows screen.
- Click Download under the driver or software of the printer. Open and then install the downloaded folder on your Windows desktop.
SIMPLE WIRELESS SETUP FOR HP 7155 PRINTER ON YOUR MAC AND WINDOWS DEVICE
You can setup your 123.hp.com/envy7155 printer for both Windows and Mac computers. Before starting the set-up process, make sure you use a printer that can print wirelessly through a local network.
- Press Wireless Button on the printer’s control panel to install 123 HP Envy 7155 Wireless Connection.
- Select Wireless Setup Wizard, then go to Settings.
- To finish the wireless link, follow the on-screen directions.
- Enter your information during the setup phase such as network username and password.
- Insert the CD-ROM of your printer systems to install the printer driver software for 123 HP Envy 7155.
- Follow the directions on the screen to finish the wireless configuration.
How do I switch from a USB to a wireless (Windows) network?
- Click on the software icon123.hp.com/envy7155 and open it.
- From the menu choices, click Tools. Tools.
- Choose Device 123.hp.com/7155 and Software.
- Tap Convert a linked USB printer to the wireless system, too.
- Follow the on-screen directions for changing the link.
123 HP Envy 7155 WPS Setup Press the Control Panel Wireless button.
- Go to Wireless Setup Wizard and select Settings.
- Follow the wireless connection on-screen instructions.
- Enter your information during the installation phase, such as network username and password.
- Please insert your CD-ROM drivers to install driver software.
- Follow the on-screen directions for completing the wireless configuration 123 HP Envy 7155.
STEP 1: Organize and guarantee that the installation specifications are fulfilled.
- Network Name Password Network: The password is also known by other names such as WEP key or WPA passphrase.
- A wireless HP Envy 7155 setup feature enables a network-based computer.
Internet access: a broadband Internet connection is always possible. - When attached to the printer, the computer and router should be activated and installed over a comparable wireless network.
STEP 2: Wireless network connection of the printer.
- Check that your 123.hp.com/envy7155 printer is already enabled, if it is not enabled.
- Tap on the wireless icon from the printer control panel displaying the wireless display.
- Access Settings on the control panel screen with a straightforward touch.
- Wireless Setup Wizard Tap HP Envy 7155 and follow onscreen panel instructions. You should now connect your printer to your wireless network.
STEP 3: Download and install the appropriate HP Envy 7155 Setup Driver.
- Let the printer switch on.
- When the printer has been attached to the laptop by a USB cable, remove the cable from the printer.
- If you have to pick a technique for selecting the printer model, enter it and go to the download section with the instructions on your computer screen.
- Choose the full functional download, which is recommended for complete printer functionality. Click the Basic HP Envy 7155 Driver download button.
HP Envy 7155 All-in – one Printer PRINT Printer Functions
A print is needed for the physical verification or storage of computer and mobile data. Set your favorite print settings when the setup is complete. To print a document or picture from your desktop or mobile telephone, please click here.
COPY
Make a quick photocopy of your 123.hp.com/envy7155 high-resolution e-All-in – one printer. Save the copied document in an image file format and repress them whenever necessary. Click here for easy measures to copy your printer on a one-sided and double-sided base.
SCAN
Experience quick scans with the HP Envy 7155 Setup and save your scanned document or picture as a PDF, emailable too. The saved scan file or the email helps you to pull the data from scanned files even when needed in future for printouts. There are many methods a document or picture can be scanned.
FAX
Fax is an simple tool for information transfer and exchange between various places in seconds. The fax function in the HP Envy 7155 printer is an additional feature which keeps your voltages away when you can’t print. Go to the link for easy fax configuration on your printer.
Simple Steps to Print a Document on 7155 Printer
The printer 123.hp.com/envy7155 supports various types and sizes of paper such as plain A4 paper, envelopes, cards, and labels. These steps are used to print a document from your Windows and Mac computers.
FOR WINDOWS:
- Access the print window to alter or reset work printing and obtain high-quality printing.
Settings for text size, font, design and appearance before printing. - To access the overall settings of the print app that was used to produce the document, click on File or Menu icon and then press Print.
- Click on Printer Properties, Properties or Preferences that may alter in the OS version for sophisticated layout, quality and print environments.
- This opens the Document Properties or Preferences window.
- Ensure that the following settings are taken into account when printing a task from your printer. The configuration may differ according to the printer model. Access the configuration accordingly.
- Orientation of portrait or landscape: layout, finishing or features tab Orientation menu.
Paper tray or source: Source / Paper Source Tab of Paper Quality. - Type of paper: Type of paper / quality or tab characteristics, type of paper or media.
- Size of paper: Advanced alternatives or functions tab Size or Size of paper.
- Printing duplex: layout, finish or function tab-> Printing on both sides.
- Change paper quality and color settings following the following choices: Paper / Quality Tab-> Settings for quality or media.
- Click on Advanced printouts alternatives for better performance.
- Paper / Quality Tab-> Black & White or Color Tab.
- Click OK and then Print.
FOR MAC:
- Access the print window to change print job settings. This shift is necessary to obtain high quality performance.
- The possible or required parameters to change before printing a job are to modify the font size and style of the text, layout options and appearance for the app for which you produced the document.
- To open the printer configuration window, click File and then click Print.
- If the menus listed below are not noticeable, click Show Details.
- From the Printer menu, select the corresponding printer.
- Choose an option to alter the print job or type of document from the presets menu.
- To choose different configurations, in the center of the window press on the unnamed menu and alter the next settings. Please note that the print settings can be modified depending on the printer model.
- Access and alter the configurations listed below to achieve the highest outcomes.
- Size and type of paper: Type / Quality or Settings for Media / Quality-> Type of paper or type of media.
- Source: type / quality of paper and/or media & quality settings-> Feed from or paper source. Paper tray or source:
- Quality: paper type / quality or media and quality settings–> quality or print quality. quality (Draft, Normal, Best and Maximum DPI).
- Duplex Printing: Layout-> Bilateral or Paper Handling-> Printing pages.
- Paper Handling Settings-> Scale to match the document size-> Destination Paper Size.
- Click Print and finish the printing process.
Simple steps to copy a document or a Photo 7155 Printer
You can generate copies of papers and pictures that are mixed or printed. Follow the directions in the same order and easily begin copying your HP Envy 7155 Setup.
STEP 1: INSERT THE ACTUAL DOCUMENT OR PHOTO ON THE COPIER
- Place the original paper on or over the copy of an automatic document in the ADF (automatic document feeder) trays.
- The glass scanner is also used to create a one-sided and double-sided print.
Check if the printer is already activated, if it is not activated. - ADF: When using the automatic document feeder to copy the document, place it on the document feeder tray with the print side facing up, and the top edge of the document moving first into the ADF tray. Put the document or image as indicated below.
- Align the width guides in order to fit the document. The ADF tray accepts a maximum of 35 paper sheets at a moment. Use the scanner glass instead of the ADF to copy pictures to prevent harm to the pictures.
- Insert the picture in real print with the scanner glass facing down and conform to the mark displayed near the glass; take the scanner lid down.
STEP 2: MAKING A PHOTOCOPY OF THE Document OR IMAGE
This step will improve copy quality by altering the settings such as paper size, paper size, type and appearance after putting in the ADF.
- Tap the Copy icon from the printer control panel’s home screen.
- Tap the keyboard icon or label the amount of photocopies needed.
- Tap the Settings icon to set the sophisticated copy settings.
- If you want to make a double-sided copy, then select On through scanner glass under the 2-sided copy option. If requested, the second page that requires a copy should be loaded on the glass.
- Verify that the input panel is loaded with the corresponding paper size and type before starting the copy work.
- Change the image size or copy it according to the original size by selecting the image size before pressing the copy button.
- Click Back then Color Start or Black Start to copy.
Scan the document or picture using a Window and Mac Envy7155 printer
Scan choice helps keep the hardcopy of a document or picture on any storage device as a softcopy. There are a few applications that come with HP Envy 7155 Setup as an integrated functionality. Let’s take a look at how the scan works with the applications.
Before scanning, check whether your printer’s full function driver or fundamental HP Envy 7155 Driver is installed depending on its model number. These applications operate on Windows 8 or 10 versions of Windows.
FOR WINDOWS PC OR LAPTOP:
HP Scan Software: Press the start button, search the 123.hp.com/envy7155 HP and HP Scan key on your printer model, and twice click to start the scan.
Compatibility: launched HP Printers in 2011 and later, and operates on or above Windows XP. Another software is accessible called HP Solution Center, comparable to the above. The HP Scan Software technique is used to start scanning but operates on printers published in 2010 and earlier.
Windows Paint: Find and open the software from the Windows search box, type Paint. You can scan and edit a document or picture with a Windows Paint in picture files like JPEG, TIFF, GIF and PNG rather than as PDF. Compatible with and greater version of Windows XP.
HP Scan and Capture: You can download and install this specific software from the Microsoft Store on your PC. This simplifies your work by scanning from your desktop or computer camera and enables you to edit, save or share scanned documents.
FOR MAC:
There are a few applications for Windows which also help Mac equipment. Before starting the scan task, it is essential to verify if your computer has the suitable scan driver installed on your Mac.
HP Easy Scan App: No download or installation costs are incurred in the app and it is Mac OS or OS X 10.9 compliant and greater. Use the connection on our website to download the app on your Mac desktop and install it.
HP Scan Software: This software is endorsed by both Windows and Mac and should be equipped with a full HP Envy 7155 Setup Driver on your printer based Mac computer. It’s Mac OS X10.11 or higher compatible.
Apple Image Capture: An integrated Mac software that is compatible with Mac OS and OS X 10.11 and previous versions with only fundamental scan features. If you choose a scan choice, this application pops up on your Mac machine automatically.
EXPLORE THE SCAN EXTREMELY
It is essential to check that your 123.hp.com/envy7155 printer has been fitted with the necessary software scan in order to have an uninterrupted scan. This is followed by inserting the document or picture you want to scan into the scanner, then using the scan key from the front panel of the printer.
STEP 1: PLACE THE IMAGE or DOCUMENT
From here you learn how to search a picture or document using your 123.hp.com/setup 7155 printer and save the scanned file to your PC in a required folder.
- Power the printer and activate it.
- Choose a technique from below to scan: Scanner glass: Keep the materials with the printed side facing down on the scanner glass and position them on the glass as shown. Now closed the scanner’s lid.
- ADF: If the ADF printer supports 123.hp.com/envy7155 by default, position the media on the ADF cabinet surface. Make sure the print side faces up and the top of the media moves first into the ADF cabinet. The guidelines for paper widths must be aligned to fit the document or picture.
STEP 2: PERFORMING THE DOCUMENT OR IMAGE YOU DESIRE SCAN OPERATION
This HP Envy 7155 system allows a number of ways to save the scanned document in the necessary format.
- Touch the Scan option on the printer control panel and then type on the computer name to save the scanned document.
- Choose a format for saving the scanned file that selects the scan choice related to the scanned document or picture. Supporting file format kinds are: PDF: Save the document without the choice of editing.
OCR: HP Envy 7155 Setup Driver pre-installed portion which supports editing a word program. - JPEG: Appropriate format to save records as well as pictures.
- Email as PDF & JPEG: attach the scanned PDF or document from 123.hp.com/Envy7155 printer as an unavailable email attachment.